New 125

Status
Not open for further replies.

Salty Cracker

Administrator
Staff member
Website Admin
Joined
Mar 10, 2012
Location
Rocky Mountains BC
Well here we go. Got the basic frame started today, just roughed in, no adhesive or secondary bracing or supports. I have a ton of wood (thanks shooter!) so I can add a lot to lock everything together and still have a really nice area underneath for the sump. Overall height is 37", the top will be waterproof plywood and a layer of foam, I plan to make spacers on the sump level so that I can run fans underneath everything for inevitable spills. When it's done there will be more than twice the wood that's here now. It will also be lagged to wall studs, there is a gap in back for the overflow pipes (Gary says he has them done!). I still have to run a second outlet, but the one here is on a rather small circuit, so I will just add a GFCI to it, and it should be good. Once the glass is all glued together and in place I'll frame in the hood and lock that into the wall and an overhead bulkhead. After all of that I'll skin it in the birch or maple (likely birch) as I'm copying (more or less) from that awesome build on reef central. Still miles away from being done, but considering I'm in the middle of building/rebuilding 2 big decks out back (and a flight of stairs that I've been putting off), I'm surprised I got this far :)

2.jpg


2.jpg
 

teebone110

Distinguished Member
Joined
Jan 5, 2011
Location
London, Ontario
Website
www.thefragtank.ca
Nice, keep an eye on the overall height... not sure if you already included the foam and plywood into your 37 inches?
You can never have enough space underneath for the upgrades that you don't need :D
 

Salty Cracker

Administrator
Staff member
Website Admin
Joined
Mar 10, 2012
Location
Rocky Mountains BC
I wanted to stay just under 40" so that's how I came up with 37", then I can put foam and ply down, and still have a decent sized canopy. I will likely do a side cabinet for all the electrical, I never did like having everything under a big mass of salt water...
 

Salty Cracker

Administrator
Staff member
Website Admin
Joined
Mar 10, 2012
Location
Rocky Mountains BC
Silicone is curing on the tank, I pick up the overflow hopefully tomorrow, so stand has to be done. I realized I can't really do the extra vertical bracing until I know where the plumbing will run, so the underside will have to wait until tomorrow afternoon or evening once the tank is sitting. I've started putting pieces together for a temp setup while it all cycles, anyone have a good sized backup skimmer they can loan out for a bit? :)
Oh and I made sure to get the ozone deleting foam, screw that damn ozone layer!!


IMG_1391.jpg

ozone.jpg
 

Salty Cracker

Administrator
Staff member
Website Admin
Joined
Mar 10, 2012
Location
Rocky Mountains BC
Okay, much thanks to Gary, I don't think I would have been able to figure out the cuts, silicone, etc. Next time I would just leave it all to him. His overflows look better than factory, I have no idea how they work, but I have faith. Very non intrusive, I have so much space in the tank to work with without overflows running top to bottom. Now I can finish the bracing and the sump will go in tomorrow. Gary talked me into a DC return pump, pretty awesome that I can just dial the flow rate instead of running full tilt and using a ball valve to regulate flow.
3.jpg
 

Salty Cracker

Administrator
Staff member
Website Admin
Joined
Mar 10, 2012
Location
Rocky Mountains BC
Water going in, sump is done, and hopefully the plumbing is watertight. Takes a while to make 150 gallons of RO/DI water, the waiting is the worst part. Still working on the return line, in fact the whole plumbing system will have to be a "play it by ear" deal. Once I can get the return pump running I can set up some socks to clear the water. I will seed the sand from my main tank once the salinity and temps are right, and get this cycling.
4.jpg
 

TORX

Administrator
Staff member
Website Admin
Joined
Nov 27, 2010
Location
Blenheim, Ontario
Website
www.thefragtank.ca
Is your return drilled for a syphon break? I don't think your sump could handle all that.

I love the custom ghost overflow. They did a great job. If it is the tank I think it is, I saw it a while back when I was in their shop


Sent from my SM-G925W8 using Tapatalk
 

Salty Cracker

Administrator
Staff member
Website Admin
Joined
Mar 10, 2012
Location
Rocky Mountains BC
Is your return drilled for a syphon break? I don't think your sump could handle all that.

I love the custom ghost overflow. They did a great job. If it is the tank I think it is, I saw it a while back when I was in their shop

He's built a twin tank for himself, mine was just the overflows on the glass. I think he had the plastic cnc'd so he did (at least) two sets.

Siphon breaks shouldn't be hard, and I also have a backflow preventer for the return pump if need be, but likely I'll just drill a small hole in the return. I'm playing around with the baffles so that I can have more water in the skimmer section, less in the others, so that I may have a lot of space for power-outage water. time will tell :)
 

Salty Cracker

Administrator
Staff member
Website Admin
Joined
Mar 10, 2012
Location
Rocky Mountains BC
Just don't forget about that syphon break before the water gets too high.

Your build is amazing though. Can't wait to see what it grows.

Sent from my SM-G925W8 using Tapatalk

Already built it in, tiny hole on the return above the water line, sump doesn't take any extra water when the power goes out, not a drop :)
Using a DC pump, very nice that I can balance the flow with the two returns. In the sump I'm keeping it fairly simple: one chamber at 12" for a constant level for the skimmer, one for heaters, dosing, etc, and then the chamber for the return pump(s). I've been told the return pump I'm using is not super reliable, so I'm likely going to get a backup, and I'll have a marineland pump ready too. One thing that's funny...the magnets don't work as well with the 1/2" glass. I may have issues with the wavemaker, but I'll cross that bridge when I come to it.
 

Salty Cracker

Administrator
Staff member
Website Admin
Joined
Mar 10, 2012
Location
Rocky Mountains BC
Siphon break was sucking microbubbles into tank, so I just shortened the return pipe to 1" below the overflow. There's still 5" of error room in the sump after that drains, I could even use the backflow preventer I have in my current tank, but it can be a pain.

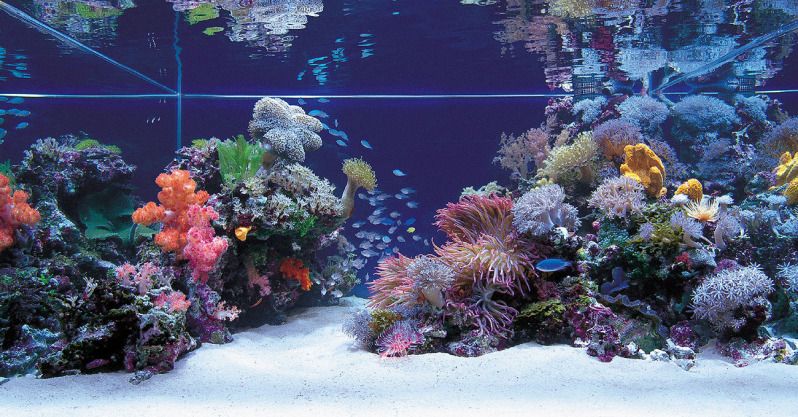
Tank is clear, now I have to seriously start looking at layouts and what I plan to keep from the old tank. For sure, I think I'm going to forsake: Paly's, monti oh and yes aiptasia. So I'm likely going to start with some dryrock I think, and some seed rock/sand, and get the tank cycling. I am thinking strongly about some kind of layout such as this:
cpfarm.jpg

I have enough space for probably 3 rock formations, and this would allow me to have a zoa/softie island separate from the sps. Then I have to look at colour choices. I'm not sure I want everything I have in the old tank sps-wise, there was a time I was grabbing every frag I could, and it's left me with absolutely no space for anything new.
 

Salty Cracker

Administrator
Staff member
Website Admin
Joined
Mar 10, 2012
Location
Rocky Mountains BC
So the thought is to get the tank seeded/set up as best as possible, and very likely nuke/reuse a lot of the rock I have now. Kind of risky with all the paly's in there, so I'll have to figure out how exactly to remove stuff without dying in the process.
 

Salty Cracker

Administrator
Staff member
Website Admin
Joined
Mar 10, 2012
Location
Rocky Mountains BC
sump.jpg

Got it running 95% silent!
2-1" wet drains (just drains, only going to add 2 strainers), and 2-1" dry drains. The only trick is adjusting the ball valves when I change the pump speed, but at full throttle we are running without any bubbles or gurgles. Adding on the canopy and enclosing the stand should literally make it silent. Temps at 75deg and salinity at 1.026 on the dot. Can likely add some rock from my sump to this sump once we hit ~80deg.
 
Status
Not open for further replies.
Top